Step 2: Draw out the plans
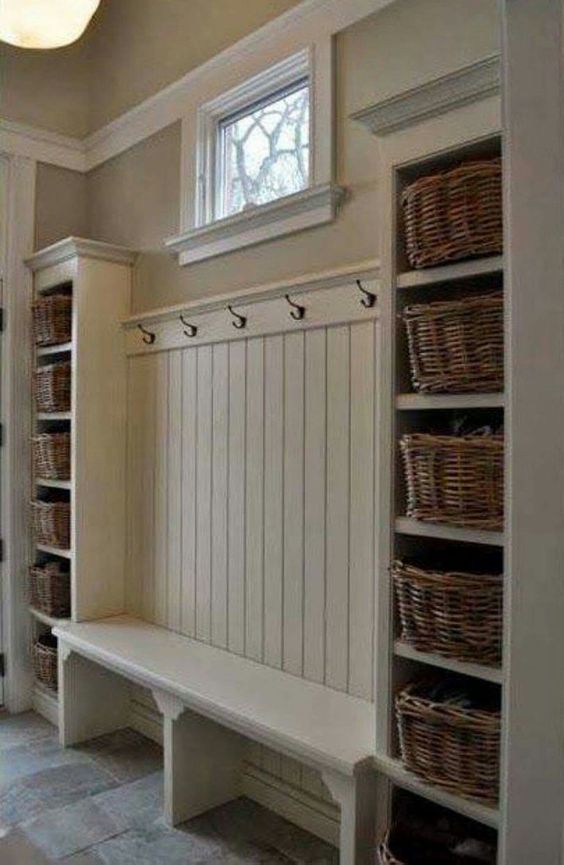
I’m someone who needs a visual reference to help guide me through a project. I can come up with ideas, but when it comes to executing, I need to have something to constantly refer back to keep me on track. Deb and I decided on the features we wanted in our entryway bench. Our version needed to have two shelf units on either side of a bench, under bench storage for shoes, and we liked the beadboard paneling on the wall with some coat hooks for coats, hats and scarves. During the design phase we toyed around with the idea of making the bench a hinged box for more hidden storage, but decided against that due to the amount of shoes we have. So… many… shoes.

In this picture of hand-drawn sketchiness, near the top of the drawing, I measured the space from the front door to where the guest bathroom door started. I also measured the clearance for the front door to swing all the way open, as well as some room to spare. The door is 33 1/2″, so i made sure there was 37 1/2″ of clearance. You’ll also see a square in the upper drawing that represents our wall mounted home security system. The system was already installed and I really didn’t want to try and relocate it. So we’d have to figure out how to try and integrate it into the design.
In the middle of the sketch, you’ll see the preliminary drawing for the whole unit. We talked through how many shelves we wanted, how tall and deep they should be, and the height and depth for the bench seating. The way we decided on the bench dimensions was to sit on chairs of different heights while we tested taking our shoes off and putting them on to see what was most comfortable for us. If you decide to build something like this, you may want to check heights (and depths) of your bench to be optimal for you and your family. However, that being said, I think our measurements should work fine for most people.
The next thing I wanted to consider was how to make sure the sizes of the pieces would work well within standard lumber sizes. So the shelve units stand 7′ high (under 8′), the shelves are 12″ wide and deep, and the bench is 18″ deep and 5′ wide.

After the preliminary details were nailed down, I needed to address two other issues that could get in the way. One was the pre-existing security system. I really just had to decide where it would end up in the piece and drill a hole for the wiring. The other issue was an electrical outlet that was going to end up just underneath the top of the bench. So I would have to be careful to make sure it was still accessible. I also did not want to move that.
